Card Payments
Last updated: January 30, 2026
Nitra card statements and payments overview
Card statement basics
Your Nitra Card statement
Your business will receive a statement at the end of your statement period for all of the card transactions made during that period.
How to view your Nitra Card statements
You can view your current or any historical statements by navigating to Card —> Statements. You can see your statement history and your current statement period.
You can download your statements, rewards, and transactions as PDFs.
How to read your Nitra statement
When you download your statement, you’ll see all transactions made during the statement period, including:
Your previous balance
Payments & Credits
Any Fees & Interest Charges
Your new balance
Points earned
Card statement payments
Payments submitted before 11:00 AM EST are processed the same business day. Any payments made after that time will be scheduled for the following business day. Once a payment is processed, it typically reflects in your available credit within 1–2 hours. Scheduled payments run at approximately 8:00 AM EST, while same-day payments are processed immediately.
Statement periods follow the calendar month (30–31 days, or 28 in February). Each statement includes a 21-day grace period between the statement generation date and the payment due date. Because our daily payment cut-off time is earlier than most banks, we offer a one-day grace period if a payment is scheduled on the due date after 11:00 AM EST.
Automatic Payments
Enable early automatic payments for your card statements
We have two forms of Auto Pay
Regular Auto-Pay – This pays three days before the statement balance is due. You can set it up for the minimum payment, statement balance, or a custom amount.
Smart Auto-Pay – This allows you to set parameters where, when you reach a certain dollar amount or percentage of your credit limit, it automatically pays a custom amount or the full balance.
To make a Manual Payment, click on Card –> Payments and then click the button on the top right corner that says “Make Payment”
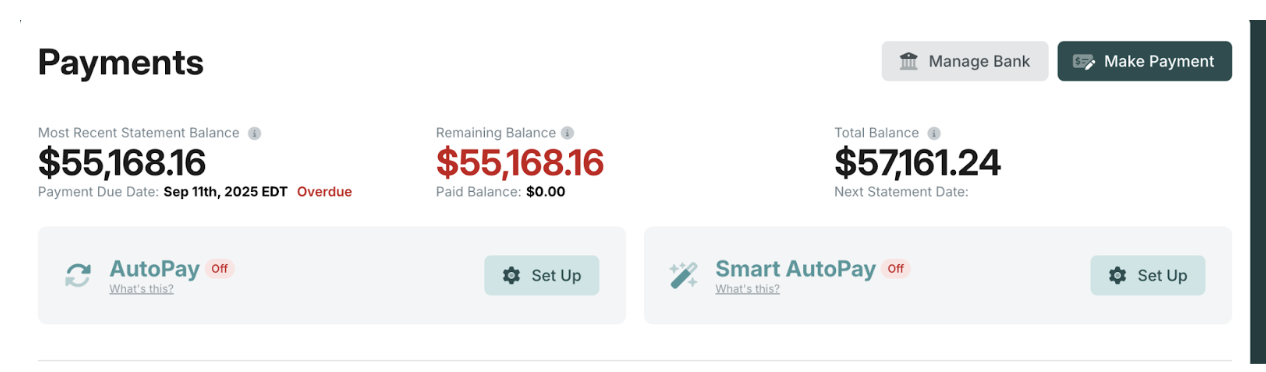
Set up early automatic payments to ensure you will always have an available balance for your expenses.
How to set up
Go to Card -> Payments> and then select AutoPay or Smart AutoPay
Excluding pending balance:
Benefits:
Statement payments always reconcile to statement amount because early auto-payments only debit cleared transactions, and statements similarly only include cleared transactions
Card balance will never be negative
Verifying bank accounts
1. Login to your account at app.nitra.com/login
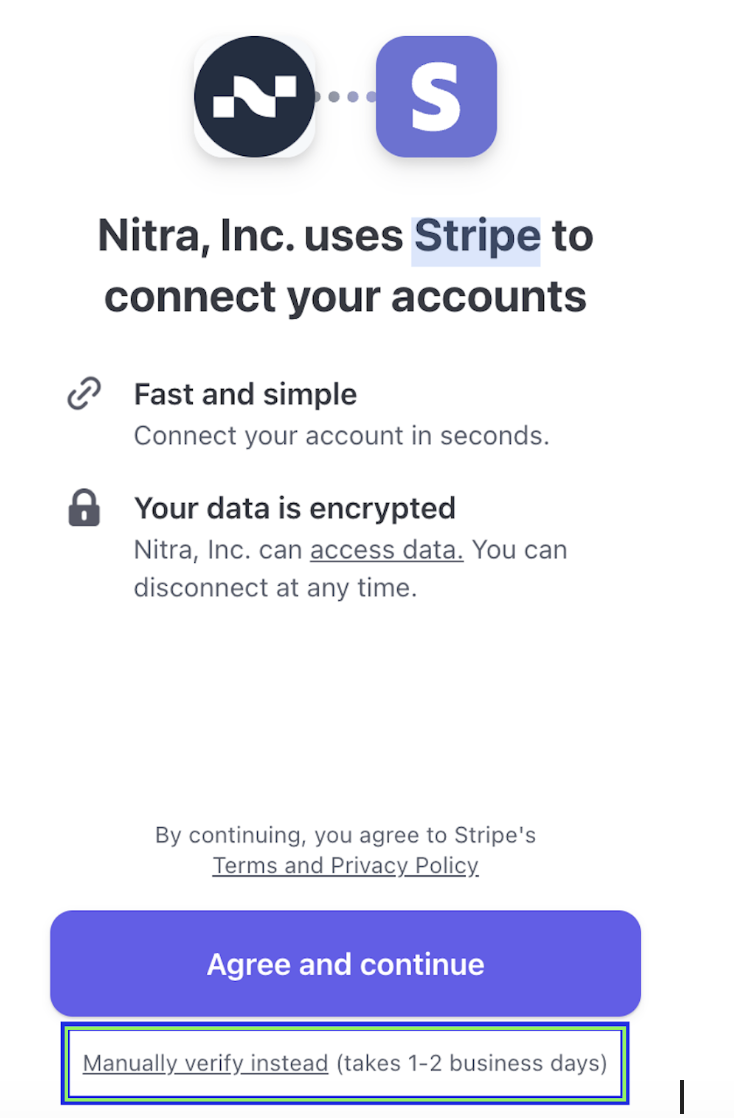
2. Click Manually Verify Instead underneath Agree and Continue, Add in Account and Routing Number
3. Login to your bank account ending in XXXX
4. Find a micro-deposit amount of $0.01
5. On the transaction name, it begins with SMXXXX
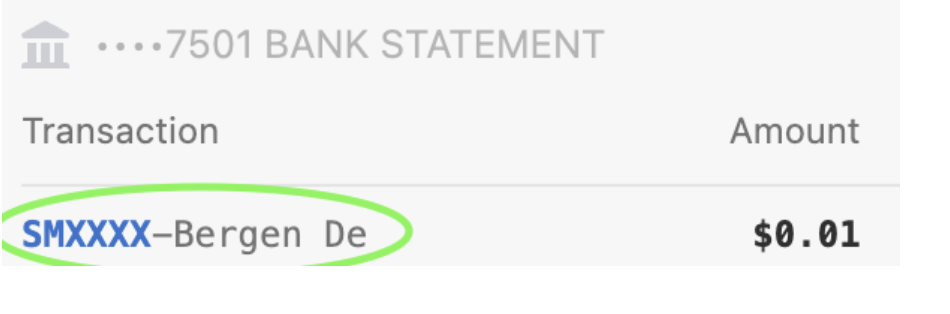
6. Add the code and complete the verification when you login to app.nitra.com/login, go to Settings, then Banking
Changing Bank Accounts
There are two bank accounts to connect:
Nitra Card
Bill Pay
The first one is for paying down the Nitra card and sending ACH wires using our Bill Pay feature. The second one needs to be connected in order to send checks or e-checks using our Bill Pay feature.