Bill Pay
Last updated: January 21, 2026
Overview
Nitra Bill Pay is made with speed and process controls in mind to move your bill from an invoice to paid as efficiently as possible. Use this guide for a step by step overview.
Uploading an invoice
The first step toward paying your bill is to add an invoice from your vendor to Bill Pay. You can do this in a few different ways.
Email your invoice:
You can forward the invoice to your special AP email address Nitra has made for you. After you forward this into Nitra, the invoice will automatically be created.
Make sure you forward invoices from a company email address (e.g. for Nitra, the email would be forwarded from an "@nitra.com" email), or from an address associated with any user profile on your account. Emails sent from non-company addresses (e.g. emails sent directly from vendors) will not be processed.
PDF or JPG
The invoice will appear as 1 of these 3 things:
Successful upload
If we can create a bill from the forwarded email, we will let the sender know that the invoice was successfully received and is being processed.
Unsuccessful upload
If we weren't able to create a bill from a forwarded email, we will let the sender know that an invoice in Nitra could not be created and the necessary steps to remediate.
Unrecognized company address
Emails and invoices sent directly to the Nitra AP inbox from a non-company address will not be processed and an auto reply will be sent with instructions to send to a company address instead.
Manually create a bill
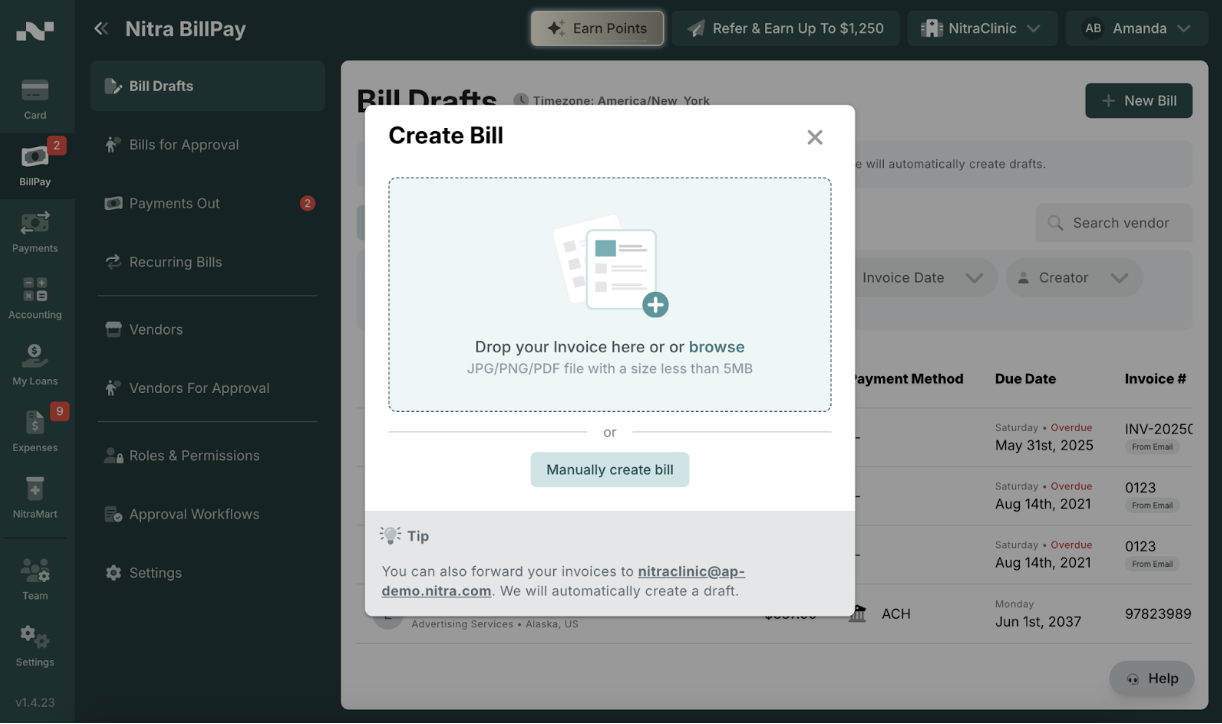
You can add any invoice file into the Bills Drafts page by clicking New bill in the upper right section of Bill Pay.
Upload Bill
Drag and drop invoices, or select the specific invoice in your file browser.
Bill drafts
Once an invoice has been submitted, we extract the invoice number, vendor name, contact information, payment details, and line items for the bill.
After uploading the invoice, you can select the drafted bill in the Bills Draft page and verify we gathered the right information. Once you've confirmed the information is accurate, select your preferred payment method and then click Continue.
Note that you can optionally add a vendor memo to your bill at this stage. Vendor memos are communicated by email to your vendor. This is only for check or e check at this time.
Bill approvals
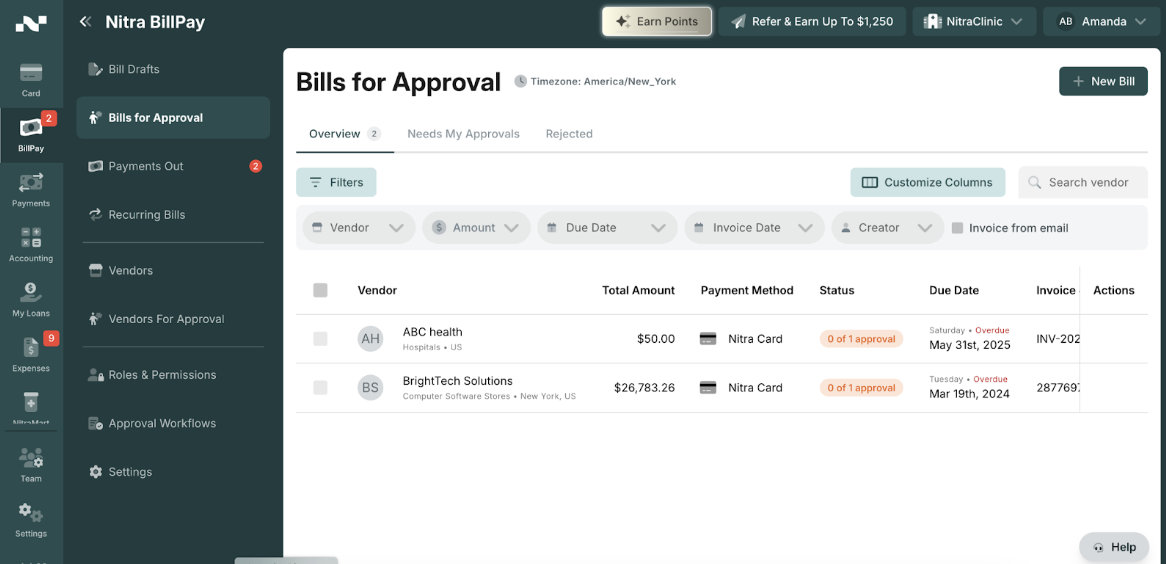
Bills waiting for approval live in the Bills for Approval tab. You can see who is the next approver, send them a reminder once a day, approve bills that require your own review, and if you're an Admin, skip approvals and pay now.
Bills can also be rejected at this stage.
Bill payments
Once a bill is approved, it will move to the payments out section where you can see its current status, when it is due, and when the payment will be released. Actions you'll need to take here vary by payment method, but for scheduled bills, you're all set at this stage.
Viewing your paid bills:
All your paid bills are available in the “Payments Out” section.
With a few easy steps bills move from invoiced to paid!
Cancel a bill
You will be able to cancel a bill only while it is in the draft stage. After that, you cannot cancel it.
Bill Pay Approval Work Flows
What is a Custom Approval Workflow? A custom approval workflow allows you to manage approvals based on specific conditions.
To create one, click + New Workflow, define conditions (e.g., submitter, amount, category), and configure approval rounds with roles, departments, or members.
Use Change Workflow Order to reorder workflows, and activate or deactivate them as needed.
You can also edit existing workflows to adjust conditions or approval rounds. If no conditions are met, the Default Approval Workflow applies.
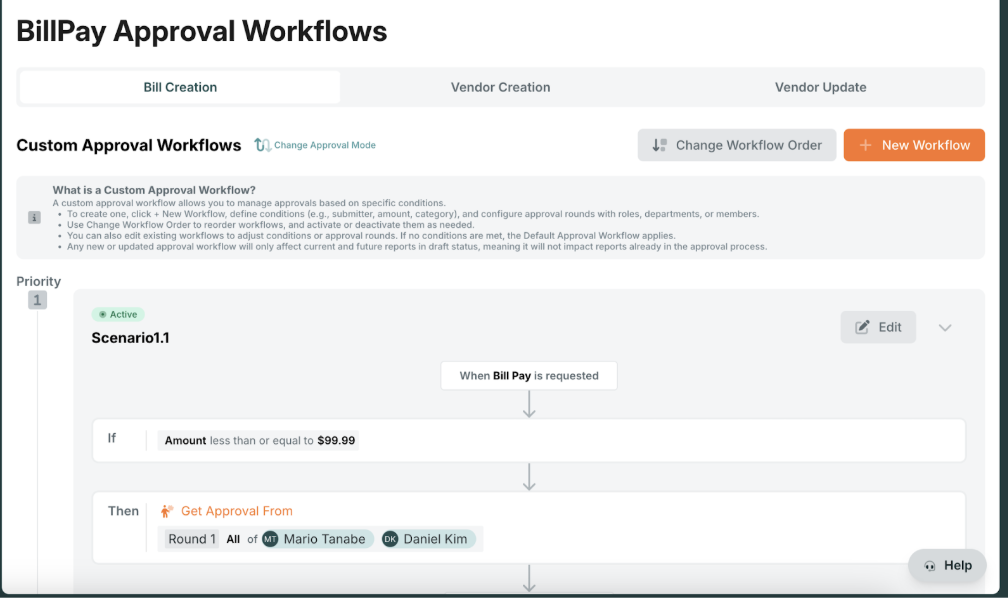
Any new or updated approval workflow will only affect current and future reports in draft status, meaning it will not impact reports already in the approval process.